
How to Paint Polypropylene Vent Frames
Paint Polypropylene Vent Frames with ease and great results using the following methods.
Yes, all of our EZRvents can be painted with newer paints formulated for plastics (Polypropylene). EZRvent frames can also be painted with a good-quality exterior house paint if properly prepared.
We should emphasize that it is equally and most important, prior to priming, to clean and prepare your vents for painting by Flame Treating and wiping with alcohol, or lightly sanding the surfaces with sandpaper and wiping with alcohol. Surface tension and residual mold release may otherwise affect your results even if the paint manufacturer does not specify this. Flame Treatment may sound scary, but is easy and fast to do.
We have tested and found the best and most forgiving results with Krylon Fusion, or Rust-Oleum Specialty Paint For Plastic, with a strong preference for the Krylon Fusion 5x. If using Krylon Fusion 5x, you can use the same paint for the Primer layers. Many of our installers do this with great long-lasting results.
We also have also have good results painting EZRvents with good quality exterior house paint if properly prepared with Flame Treatment or other prep as outlined below. Then followed with 2-3 coats of Krylon Fusion Primer for plastic, Krylon Fusion 5x, or Rust-Oleum Specialty Plastic Primer. Both the Preparation and Primer for Plastic steps are important for proper adhesion.
Paint Polypropylene Frames - Steps are Easy as 1 - 2 - 3
1
Prep Vent Frame

Flame Treat & Alcohol Wipe Cleaning
2
Prime 2 Coats
Primer for Plastic
3
Paint 2 Coats
Paint for Plastic or Exterior House Paint
Flame Treatment or other Prep Is Most Important Step
It's as Easy as That!
EZRvent Polypropylene Frame Painting Steps:
EZRvent Paint Polypropylene Frame Instructions:
1. Clean and Prepare your vents
Choose one of the following options a, b, or c - (listed in order of preference)
- a. Flame Treat & Alcohol wipe (preferred method for professional results)
- Pass a propane torch oxidizing blue flame lightly over the surface of the frame until it just has a slightly wetted appearance. (It does not take much. Keep the flame moving and do not dwell on an area to not over heat and melt the plastic frame. ) We are looking to just ionize the pladenatured alcoholstic surface with the blue part of the flame.
- Clean by Wiping with Denatured or IPA Alcohol
- Repeat above two steps
- Mask Mesh area
- b. Lightly Sand / scuff the surfaces with a fine Scotch-Brite pad or 200- 300 grit sand paper and wipe with IPA alcohol twice. Then Mask Mesh area.
- c. Clean with Polyvance SUPER CLEAN Plastic Cleaner, mask the mesh area , and follow with Polyvance PLASTIC MAGIC
This is the most important step to ensure proper adhesion. Flame Treatment of Polypropylene is our preferred option as it is the easiest/ least effort, and provides the best surface preparation. Flame Treatment may sound scary but is easy and fast to do. This is how professionals paint Polypropylene auto body bumpers and other parts. Flame Treatment with a blue flame oxidizes the plastic, changing the surface chemical structure and surface tension, and raising the glass fibers on the surface of EZRvent glass-filled polypropylene frames. Flame Treatment also allows impregnated mold release agents to be released to the surface, where they can be cleaned away during the Alcohol wipe step. Once properly flame treated, water and paint will sheet on the plastic surface vs beading up.
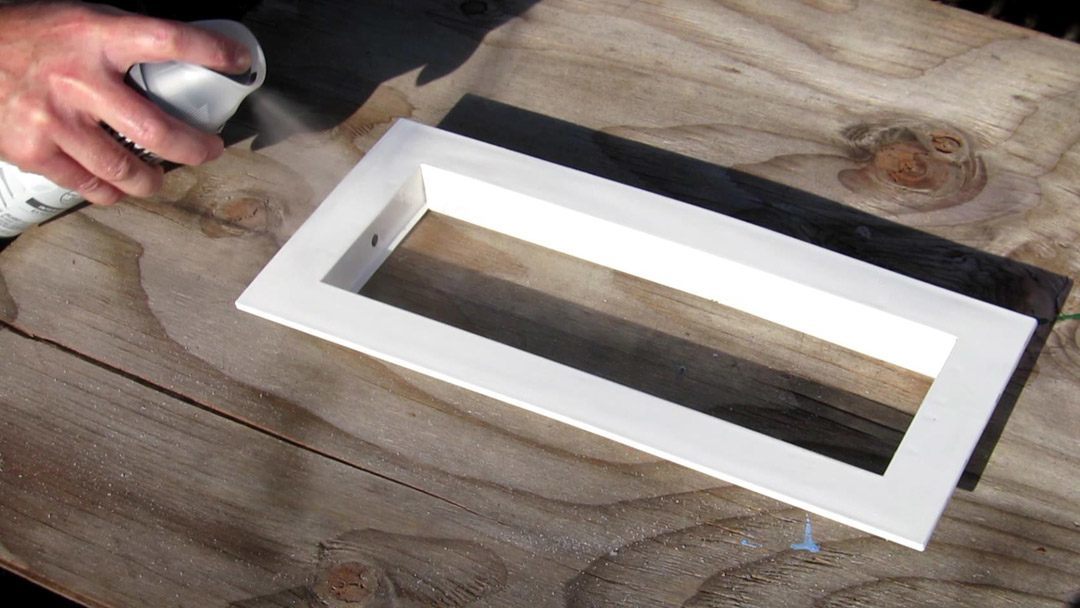
2. Prime with Primer for Plastic
Choose one of the following options a, b, c, or d - (listed in order of preference)
- a. Krylon Fusion All-In-One 5x (preferred)
- b. Krylon Fusion Primer for Plastic (preferred)Polyvance
- c. Rust-Oleum Specialty Plastic Primer
- d. Polyvance PLASTIC MAGIC (if prepped with Polyvance SUPER CLEAN)
Then:
- Primer Paint 2 Coats with one of the above options. Hold can 4-6" from the surface and apply with even strokes to fully wet surface. This will deliver all the solvents to the plastic surface and provide a good bite. Do dust the surface or apply from a higher distance then 6" as solvents in primer will dissipate before etching into the Polypropylene Plastic.
- Allow to flash off 5-10 min between coats and proceed to Paint if using spray paint.
- If using house paint, allow the primer layers to cure a full 24 hours or more depending on environmental conditions.
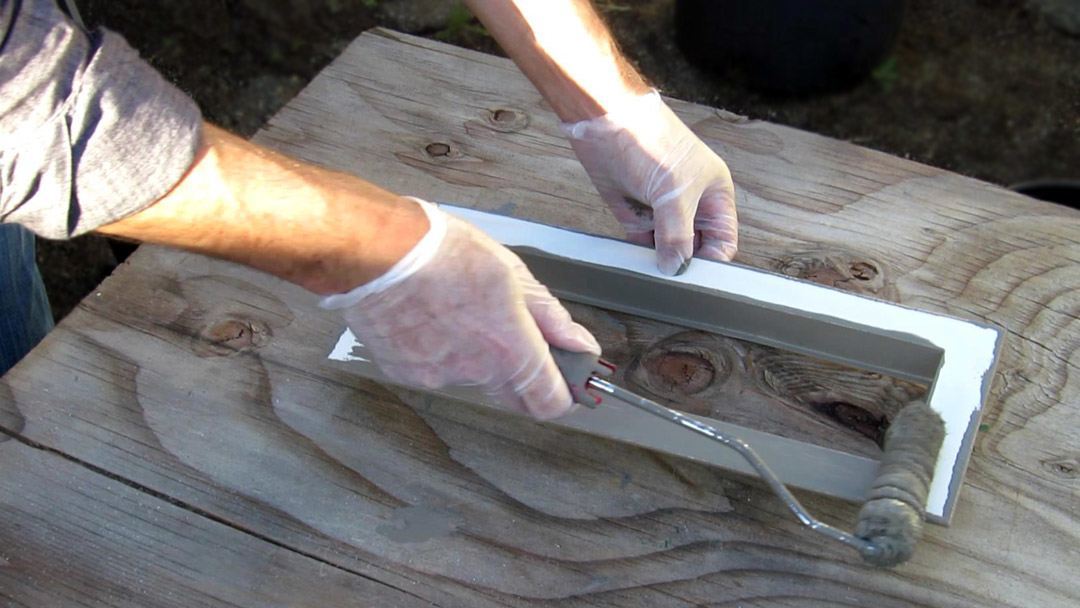
3. Paint Vents with 2 – 3 coats of good quality paint
Choose one of the following options a, b, c, or d. (All options a-c have been tested and provide good results with prior Prep and Prime steps)
- a. Krylon Fusion All-In-One 5x (preferred)
- b. Rust-Oleum Specialty Paint For Plastic
- c. Benjamin Moore Aura Exterior House Paint
- d. Or - other high-quality Exterior House Paint
Spray, Brush, or Roller application all work well. Roller application provides an orange peel or slightly hammered texture. It is important not to dilute your paint when applying by brush or roller. If you need to thin your paint for spraying, use Benjamin Moore Paint Extender (518) or a similar product from your desired paint manufacturer. Paint extenders are typically 100% acrylic and will not affect paint adhesion if used per paint manufacturer instructions. - Do Not thin your paint with water; this will cause your paint to not form an effective bond.
Pro Install Tips:
Black-out Paint Jam Sill before EZRvent install
On high-end jobs, after removing old vent and vent screen, Black-out Paint the jam sill and framing studs in vent opening with black spray paint. This really makes backgrounds disappear and the finished job look great!
To Caulk or not to Caulk
Less is more . . . EZRvent frames have been designed to not trap water and allow for water to pass and weep out. In most cases, not applying caulk is better, as it allows water to drain freely.
In high-rain areas and some building codes, a single bead of caulk at the top and side edges of the vent is required. *Note: However, improper application of caulking or over caulking can actually lead to more harm than good. It is important not to trap water when caulking your vents. *Do not apply a Caulk bead along the bottom edge of FV100 or FV816 series high-rain areas and in vents to allow for proper drainage.
Painting EZRvent Vent Frames
Painting video coming soon
EZRvent FV100 Easy Replacement Vent Installation Video
Summary
Article Name
How to Paint Polypropylene Foundation Vents and Garage Vents
DescriptionEasily Paint Polypropylene Foundation Vents and Garage Vents in 3 easy steps: Clean and Prepare Surface, Prime, and Paint. Preparing the surface with preferred Flame Treatment is most important step.
Author
EZRvent
Publisher Name
EZRvent
Publisher Logo